Contacts Import
Video Tutorial
Contacts Import Tool
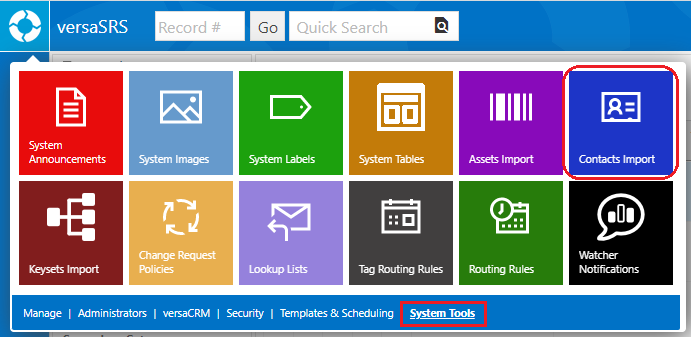
The Contacts Import Tool is used to import contacts into versaSRS as versaCRM Contacts from another source, typically a spreadsheet. To access the tool select the Contacts Import icon from the versaSpinner - System Tools tab.
The below steps detail how to import Contacts into versaSRS from an Excel spreadsheet.
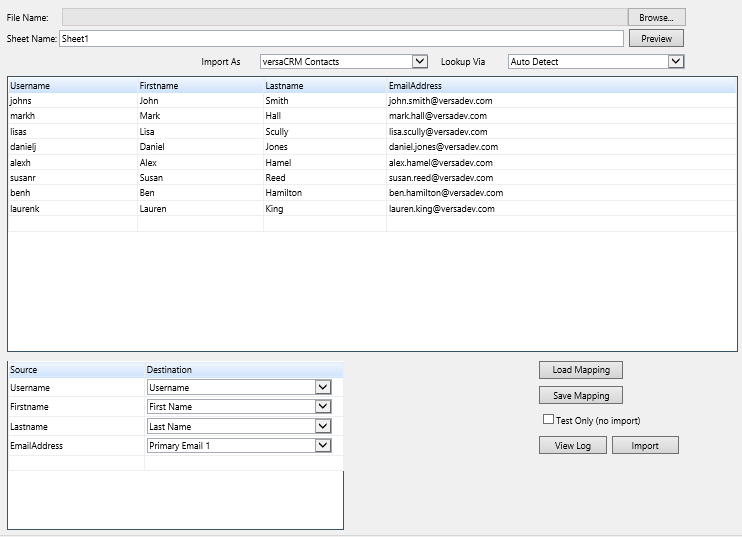
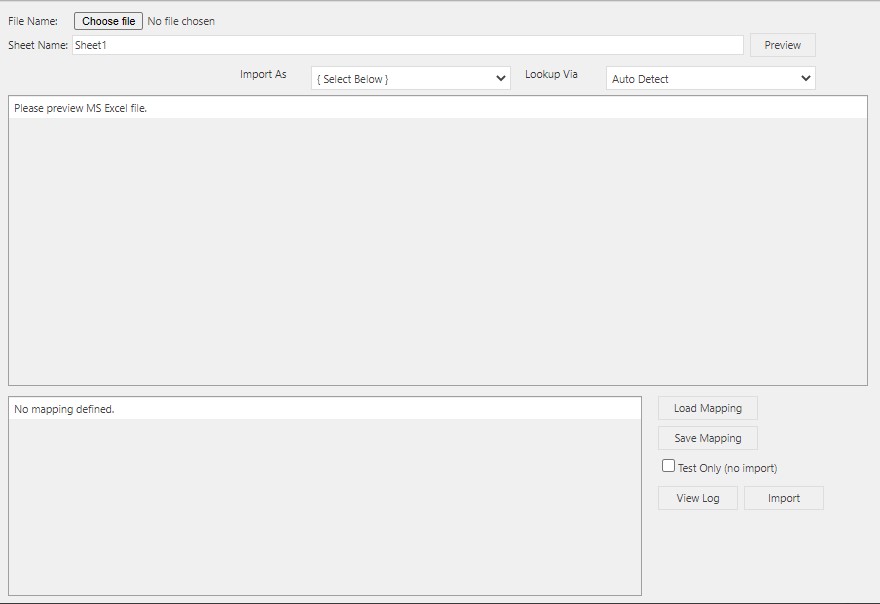
- Click the Choose file button and select the spreadsheet that will be used for the import.
- Ensure that the Sheet Name field is set to the name of the sheet in spreadsheet that will be used for the import.
- Select one of the options in the Import As drop-down box to determine what kind of contact you will be importing. Importing as a versaSRS Contact will give the option to import as an Unmanaged or Managed contact. An Unmanaged contact will have a negative ID number to distinguish it from managed contacts.
- You can use the Lookup Via field to detect the unique identifier for the contacts in the spreadsheet, allowing the import to identify existing Contacts in versaSRS that match any contacts to be imported.
For example, if Username is selected the username field in the spreadsheet will be used for the comparison to the existing Contact. If it finds a match then it will do an update rather than insert a new record. By default the Lookup Via field is set to auto detect the unique identifier - Select the Preview button to populate the contacts and allow the mapping to be selected; you may receive an error at this step:
- If it reads "Microsoft.ACE.OLEDB.12.0 provider is not registered on the local machine" you will need to consult this Knowledge Base article.
- If it contains text similar to "Message: 'Sheet1$' is not a valid name." the name of the Sheet in the spreadsheet file does not match the name in the Sheet Name field.
- If it contains text similar to "Access to the path 'C:\Program Files(x86)\VersaDev\versaSRS\modules\versaContax\versaContaxImport\upload\48fedf6d-1838-44f2-a07d-41535c021a24' is denied." the write permission for the Group or User that is set for the versaSRS Application Pool Identity on the machine has been removed.
- In the Mapping section the Source will be populated with the fields from the spreadsheet. The Destination fields correspond to fields in the contact module for versaSRS. You will need to select each of the fields in the Destination column to the correct mapping for each of the fields from the source. Mappings can be Saved and Loaded so there is no need to repeat this process provided the source spreadsheet has the same fields when doing another import.
- Once the Mapping is complete the import is ready to go and can be executed by clicking the Import button. The Test Only checkbox can be used to do a test run that will not update the database. After a test run you can view the log file by clicking View Log to confirm that the import is correct.